
Social Media
here are helpful guides to assist you in uploading your content!
So you want to post your new photos on Instagram, but you’re unsure how to get the best results?
Then this guide here is just for you!
Posting a Photo
Luckily, Instagram doesn’t require optimal pixel sizes for you to get a great upload. You just need to make sure and have the latest updated from the app downloaded, and simply select whether or not you’d like to have the photo be full frame, or cropped in for square sizing.
To upload a Photo
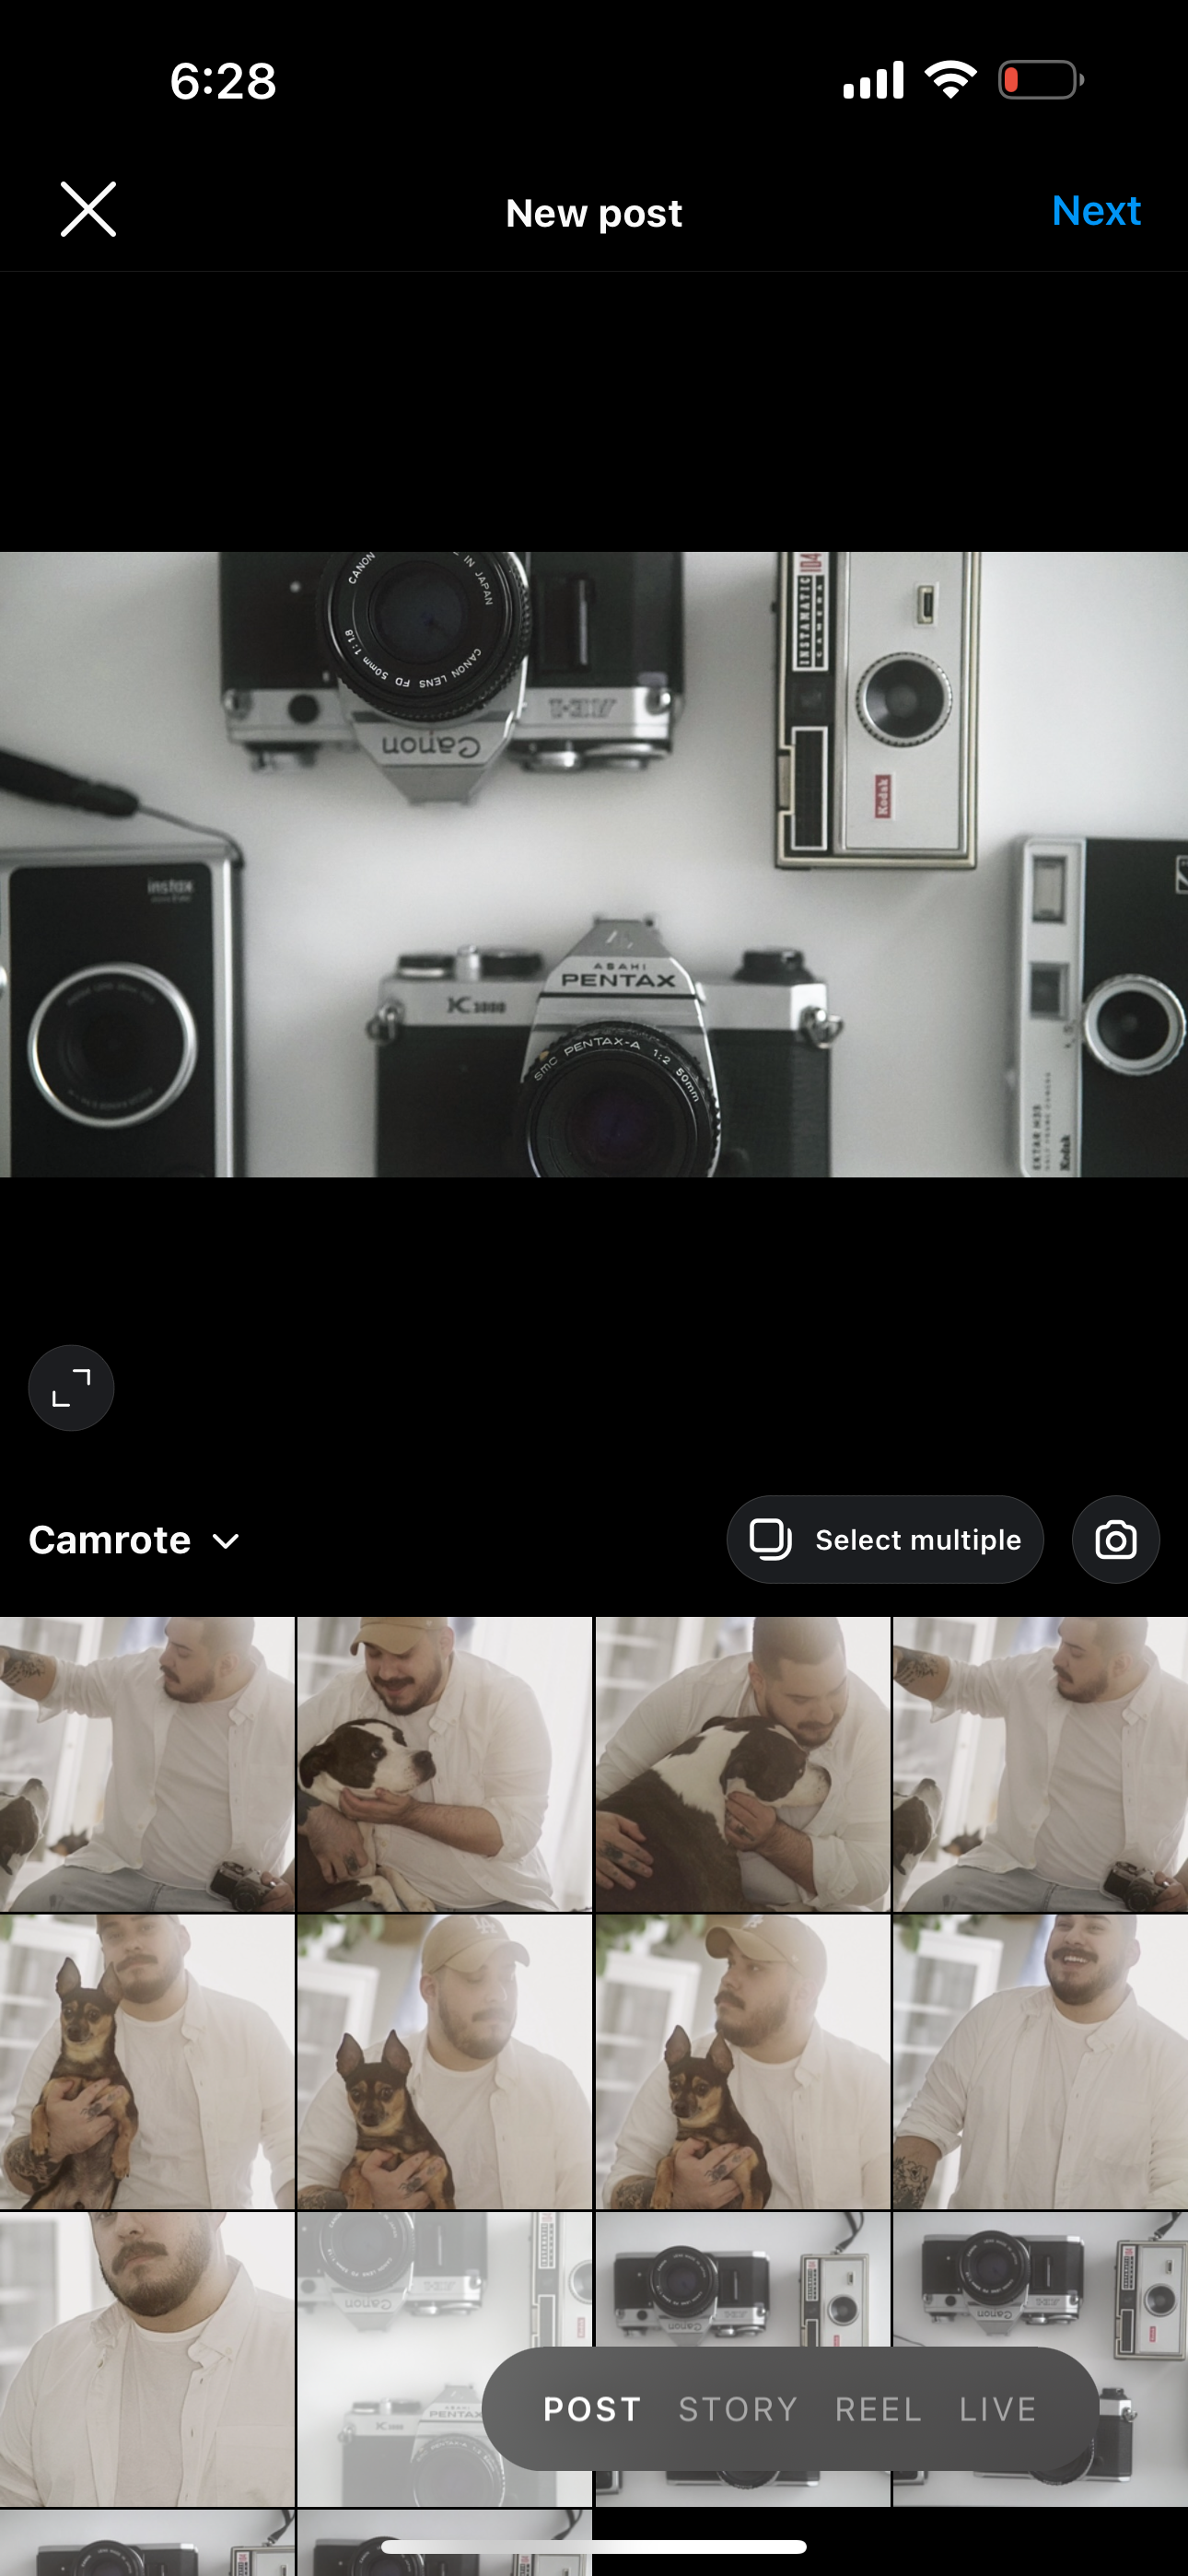
1. Open the App. Select the “+”.
2. Once selected. Choose a Photo.
3. Once selected. You can adjust the size.
Options are limitless.
4. Select the Next, Button and Continue to Upload.
You’re Done!
Reels and Stories
Recently Instagram Updated their App, so to Upload a Reel you will follow the same steps as uploading a photo like above.
As for Instagram Stories,
This is how to get started.
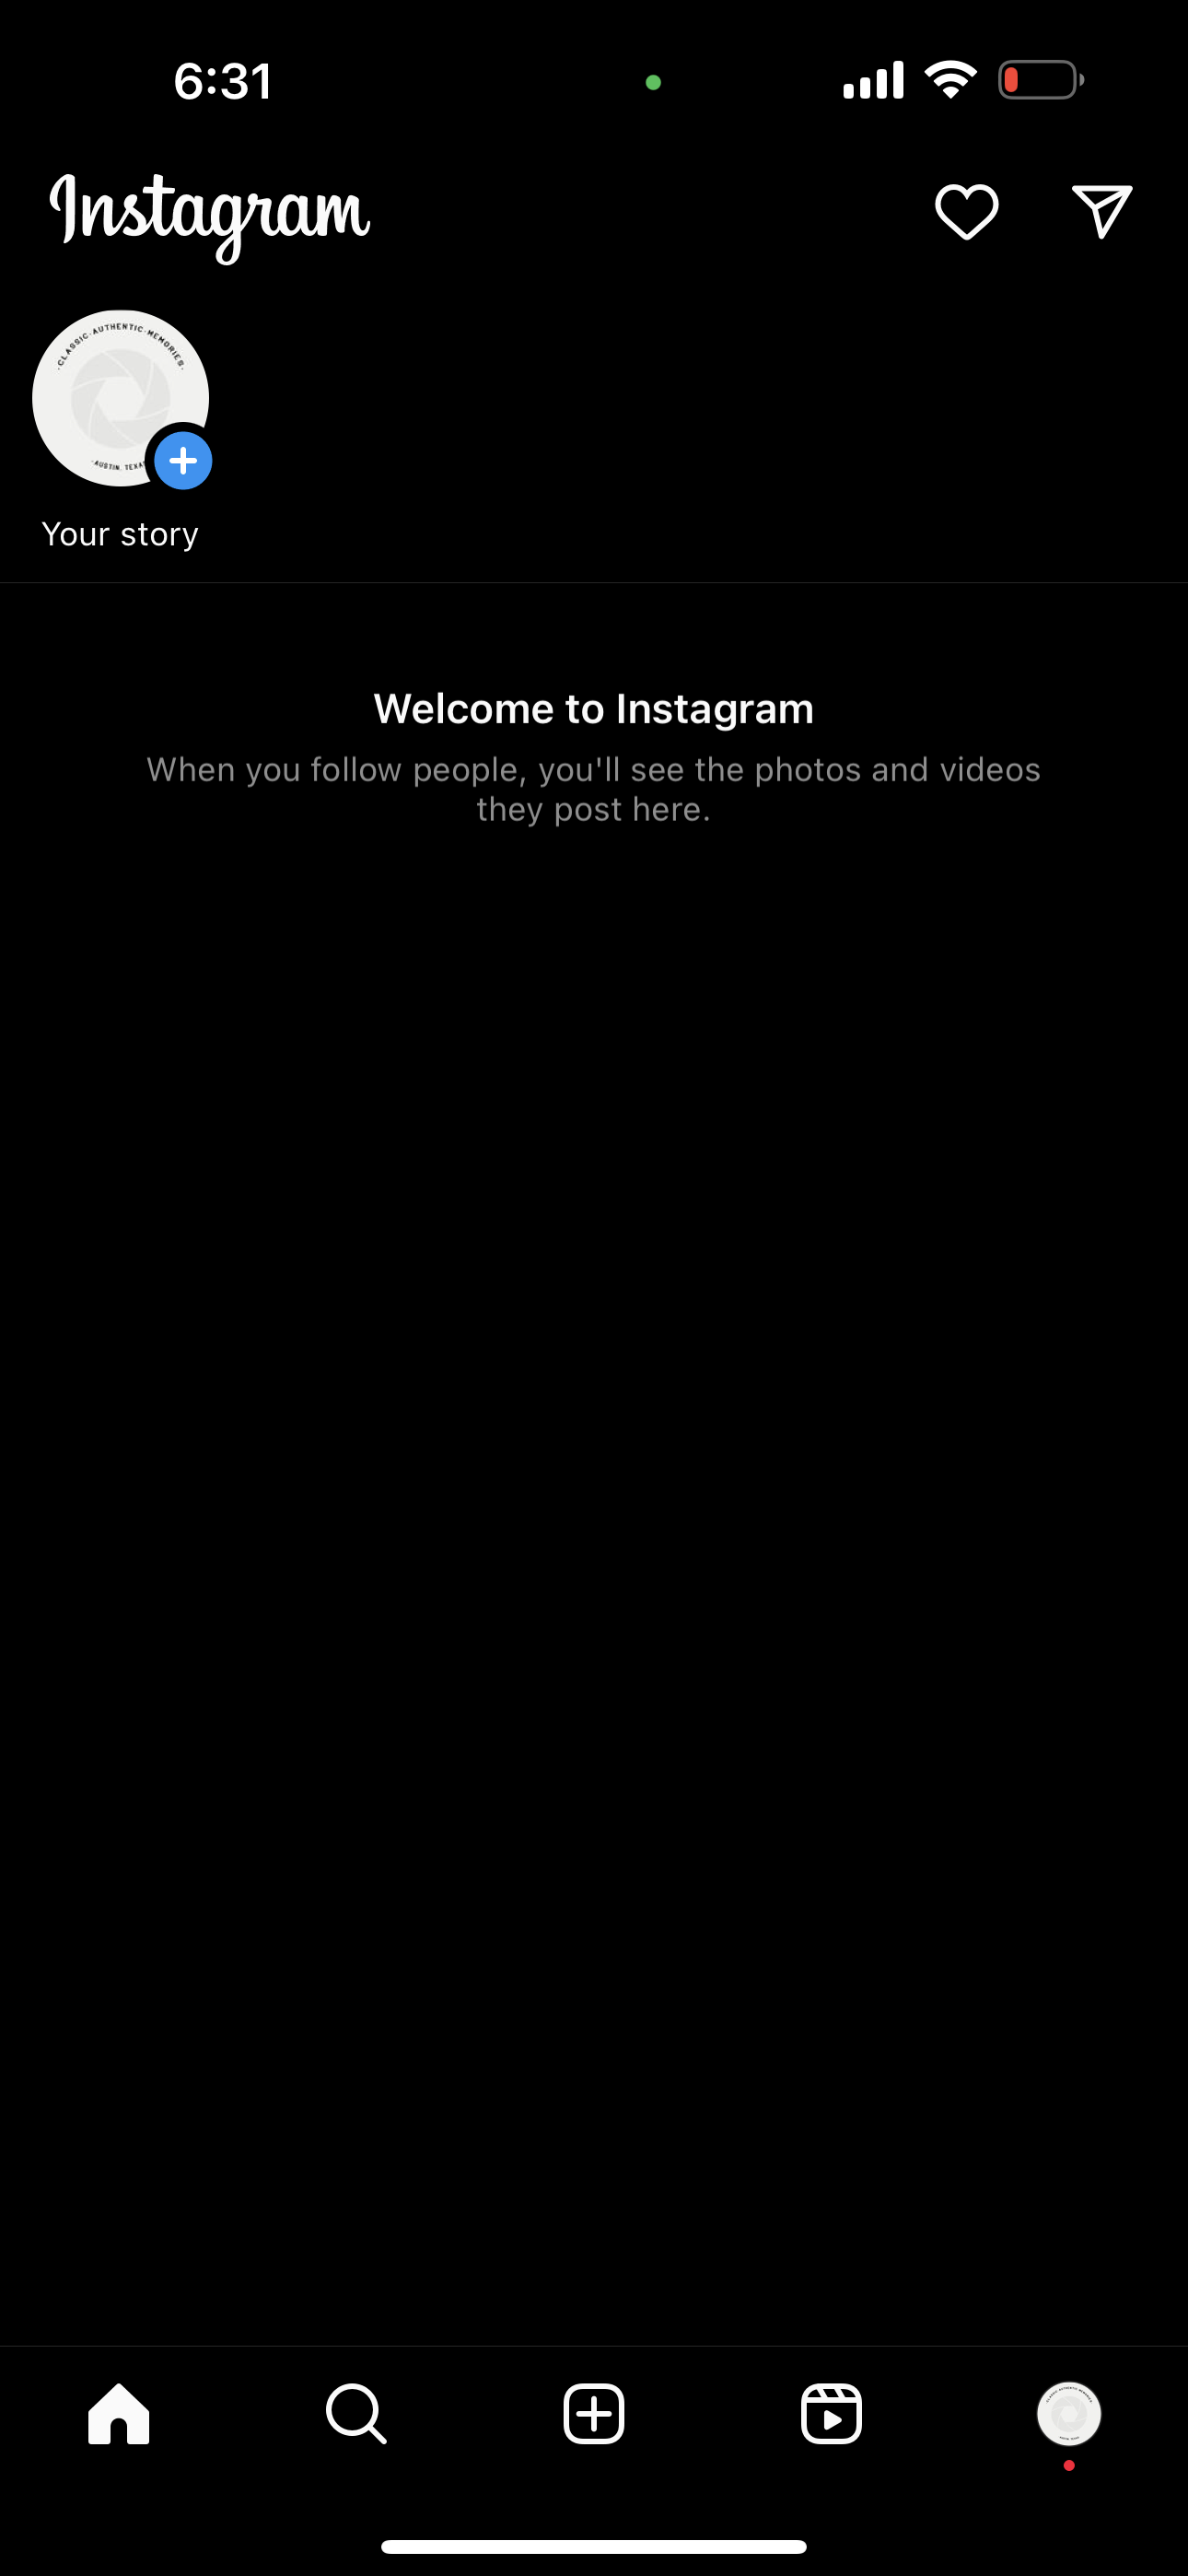
1. Open the App. Swipe Left to Right.
2. It Should look like the image above,
From there if you click the square in-
the bottom left corner it will open your photo library.
3. Select the Image or Video you would like to Upload.
4. From here click the white arrow in the bottom right.
5. Now hit the Blue “Share” Button!
You’re Done!
Hope this was helpful.
Facebook is the best place to show off your new photos
Here’s a helpful little guide to get the most out of it!
Post a High Quality Profile Pic
in order to post the best profile photo Facebook recommends resizing profile photo images 360 x 360 Pixels. So you will need to crop to a square image prior, that will yield the best results.
Additionally Please make sure you upload from your computer.
This will allow the best results for your image to be uploaded.
if you don’t know how, here is a little guide.
1. First Open your Image, then crop.
2. Next, Go to the top left and find “Tools”, Adjust Size
3. Once you have selected Adjust Size, you’ll get a pop up like shown below, in the right column where it says “inches”, click there scroll up and select “Pixels”. Then input desired size.
4. Done! All you have to do now is Upload!
Guide for Sizes:
Profile Picture — 360 x 360 px
Cover Photo — 815 x 315 px
Timeline/Misc Photo — 720 x 720 px
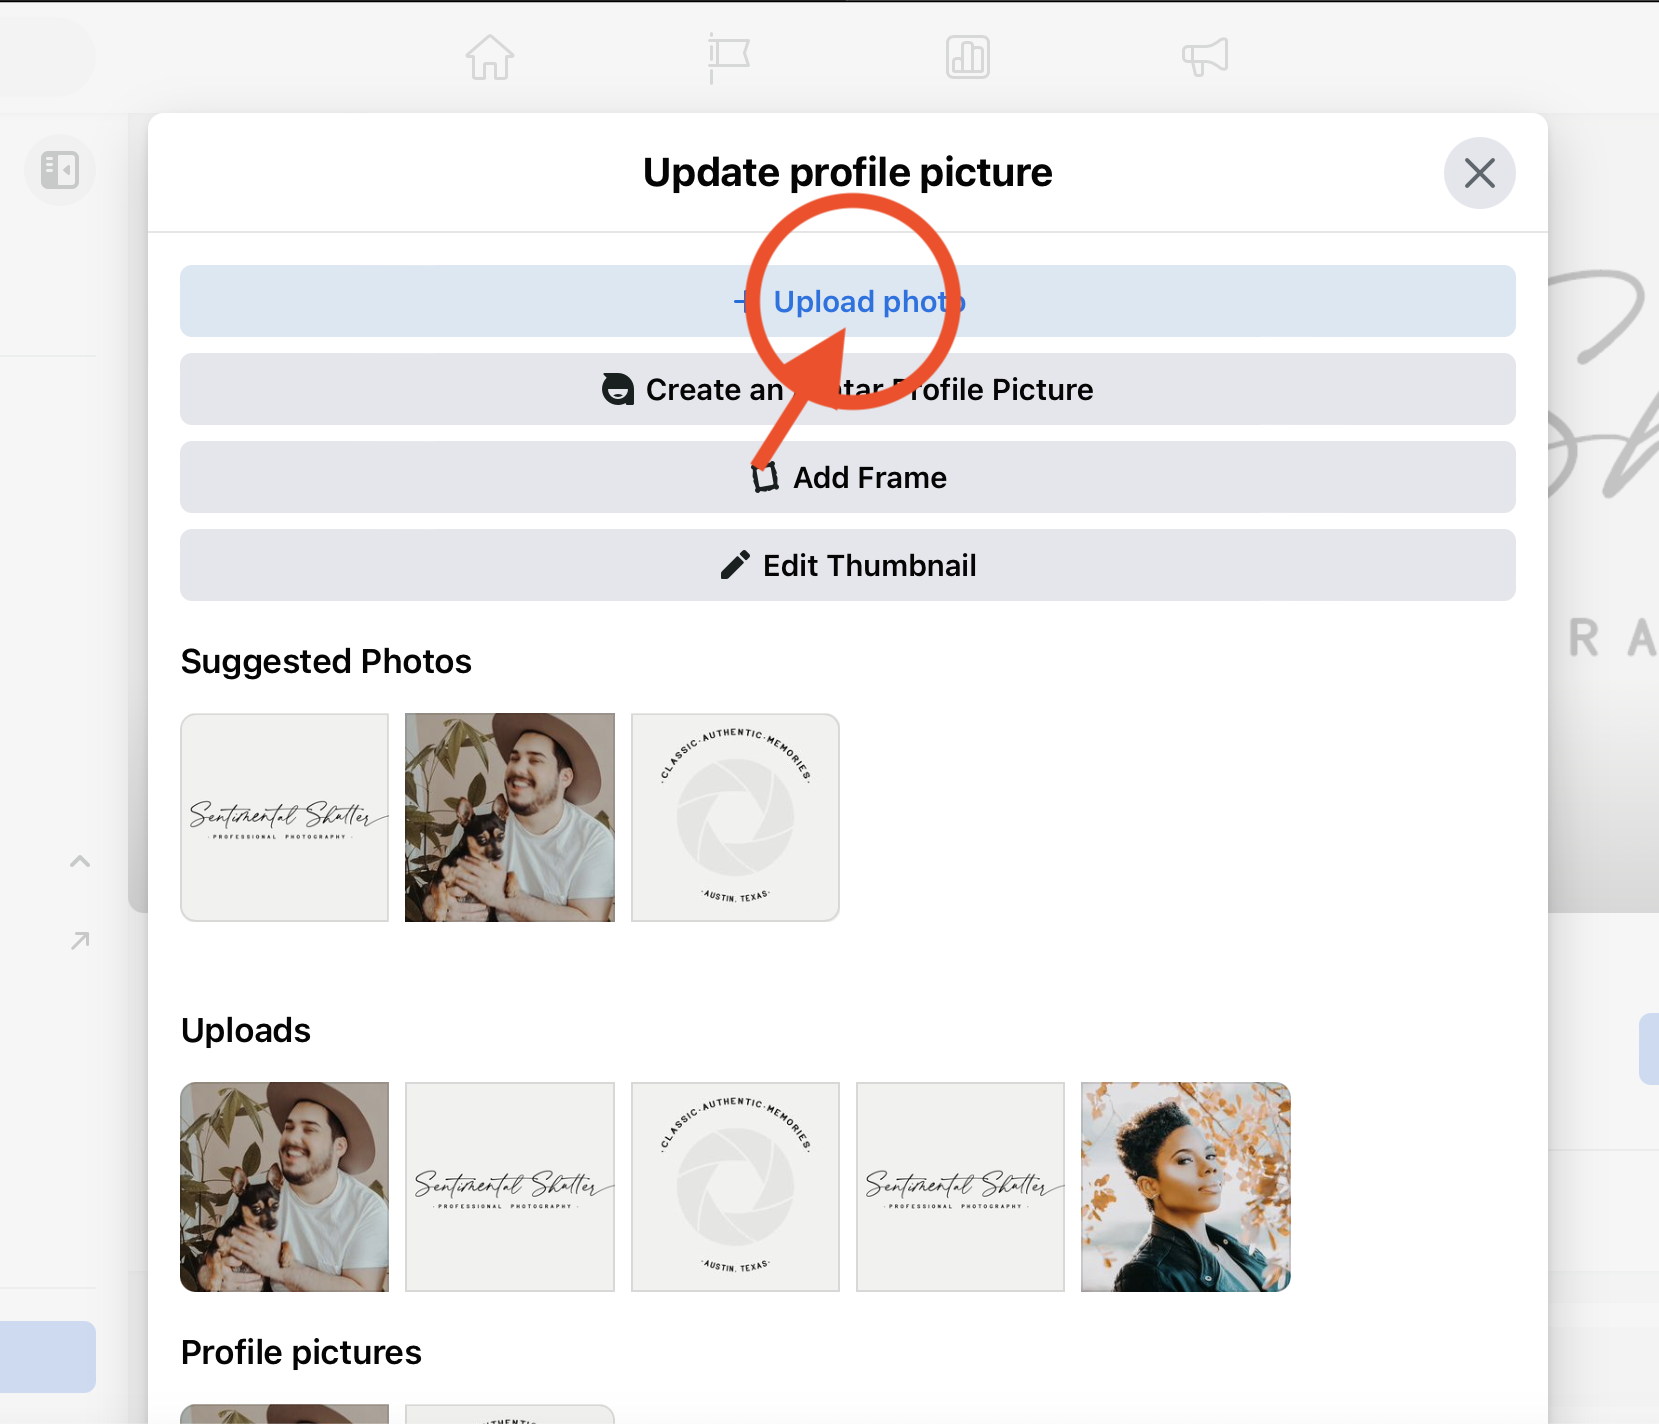
Here is how you post a profile photo,
Click the small Camera Icon, a small Menu will pop up.
Click “Update Profile Picture” in the Menu. Shown above.
Another pop-up will spring up with a “Upload Photo” button.
After clicking the “Upload Photo” Button this pop-shown above will appear. Find the image file on your computer and select it to Upload, and Done!
I hope this short guide was helpful.
Posting a Cover Photo
here is how to post a cover photo.
following the same guidelines and recommendations listed above,
you should be able to follow the same steps
and get a high quality cover photo.
Thank you!


Miscellaneous
Q: I upload a photo and the quality is bad?
A: Interesting and Complex! Here are some helpful hints to make sure you maximize the most out of your beautiful images,
Although technology has greatly advanced unfortunately uploading from a Smartphone or Tablet to social media websites specifically, can for some reason reduce the quality of uploaded images.
Why?
Explained, well your cellphone can often without our knowledge compress your images. It can shrink the image size or even lose data the image has by having it trade across devices or move. The more times back and fourth between devices that compress, typically the lesser quality it will get.
So when you finally go to upload the content from your phone, the quality can be greatly reduced.
Certain apps like Instagram, TikTok and Tumblr sometimes account for this and are able to take the image file without compression or alteration because they are made for small screens and try to maintain image integrity while uploading, which makes sure it looks true to the original but for websites like Facebook, LinkedIn, Pinterest and Snapchat or Printing Service Websites it’s best to always upload directly to the website with the original file and website specifications for high quality uploading directly from your computer.
Hopefully in time Smartphones will be able to handle this and it looks to be heading this way, however if you are struggling with a grainy or pixelated image please use the original large file size and upload that directly to whichever website you need.
Please also make sure your computer and devices are updated to the most recent software to optimize your results.
for other apps and websites not mention
we can’t be sure what exact specifications will work for uploading images or video content but we do recommend reaching out so that we can assist you with uploading.
Branding Your Content
You can make the most out of your Instagram, Facebook and Other Social Media Content by Streamlining your Color Scheme, Aesthetic and the type of content you’d like to put out.
A great way to do this is utilizing third party templates,
Tons of Websites offer Templates these days.
Canva, Adobe, Creative Market.
Just to name a few, but today I’ll refrence Canva.com
This is not sponsored, You can make a free account
and use the templates to curate exactly the image or marketing you wish to share. The possibilities are limitless.


